Embarking on a hiking or trekking journey presents an opportunity to connect with nature, challenge your limits, and immerse yourself in the great outdoors. To navigate various terrains and make the most of your experience, consider incorporating a versatile tool into your gear arsenal: trekking poles. These simple yet effective accessories offer numerous benefits, from enhancing stability and balance to reducing strain on your joints. In this guide, you’ll learn how to use trekking poles effectively, enabling you to navigate trails with confidence and ease.
Trekking poles aren’t just for seasoned hikers; they can benefit hikers of all levels, from beginners exploring gentle trails to advanced trekkers conquering rugged mountains. In the following sections, you’ll discover the fundamentals of using trekking poles, from adjusting their length to mastering various techniques for different types of terrain. Whether you’re traversing uphill paths, descending steep slopes, or tackling flat stretches, trekking poles can become your trusty companions, offering support and enhancing your overall hiking experience. Let’s dive into the world of trekking poles and learn how to use them effectively on your next adventure.
Understanding Trekking Poles
Before you start using trekking poles, it’s essential to understand their components and features. Trekking poles are designed to provide stability, balance, and reduced strain during hiking or trekking. Here’s what you need to know about the basic components of trekking poles:
Handles:
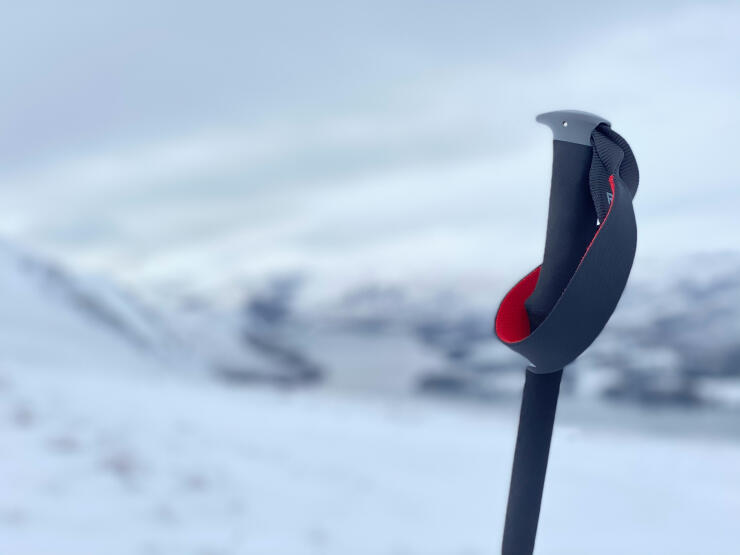
Trekking poles come with ergonomic handles designed for a comfortable grip.
Handles are often made from materials like cork, foam, or rubber.
Shafts:
The shafts are the main body of the trekking poles, usually made from lightweight materials such as aluminum or carbon fiber.
Some poles have adjustable shafts to customize the length according to your height and the terrain.
Straps:
Wrist straps attach your hands to the handles and prevent you from dropping the poles.
Adjust the straps to fit comfortably around your wrists without causing strain.
Tips:
The tips of trekking poles are typically made from durable materials like tungsten carbide.
They provide traction on various surfaces and prevent slipping.
Baskets:
Baskets attach to the bottom of the trekking poles to prevent them from sinking too deep into soft ground.
Larger baskets are suitable for snowy or muddy terrain, while smaller ones are ideal for rocky trails.
Shock Absorption:
Some trekking poles come with shock-absorbing mechanisms that reduce impact on your wrists and arms.
Understanding the different components of trekking poles will help you choose the right poles for your needs and ensure you’re using them correctly during your hiking adventures. As you become familiar with the components, you’ll be better equipped to adjust, grip, and utilize your trekking poles effectively on the trail.
Adjusting Trekking Poles
Properly adjusting the length of your trekking poles is crucial to maximize their benefits and ensure your comfort while hiking. Whether you’re ascending steep slopes, descending tricky terrain, or walking on flat trails, the right pole length can significantly enhance your stability and reduce strain. Here’s how to adjust your trekking poles effectively:
Step 1: Determine Starting Length:
Begin with the poles collapsed to their shortest length.
Hold the pole with the grip resting on the ground and the tip pointing upward.
Step 2: Adjust for Terrain:
On flat terrain: Adjust the poles to reach your wrist when your elbow is bent at a 90-degree angle.
For uphill sections: Shorten the poles slightly to help with ascent.
For downhill sections: Lengthen the poles to provide support and balance.
Step 3: Lock the Poles:
Many trekking poles have external locking mechanisms, such as twist locks or lever locks.
Adjust the length and securely lock the poles by following the manufacturer’s instructions.
Step 4: Test and Refine:
Take a few steps with the poles to ensure they’re comfortable and provide the desired support.
Make further adjustments as needed based on the terrain and your comfort level.
Step 5: Uphill and Downhill Adjustments:
When ascending, consider shortening the uphill pole and lengthening the downhill pole.
This helps maintain a comfortable arm position and optimal support.
By adjusting your trekking poles correctly, you’ll be able to maintain proper posture, distribute your weight effectively, and reduce the strain on your joints. Regularly assess the terrain and your comfort level to make on-the-go adjustments that cater to different inclines and trail conditions. Properly adjusted trekking poles can significantly enhance your hiking experience and provide the support you need for a successful outdoor adventure.
Proper Grip and Wrist Strap Usage
Using the correct grip and wrist strap technique while using trekking poles ensures that you’re getting the most benefit and comfort from these accessories. The right grip and strap usage can help you maintain stability, reduce fatigue, and improve your overall hiking experience. Here’s how to achieve a proper grip and use wrist straps effectively:
Proper Grip:
Hold the trekking pole grip with a relaxed and natural grip.
Keep your fingers gently wrapped around the grip, avoiding excessive tension.
Wrist Strap Usage:
Slide your hand up through the wrist strap from underneath, so the strap rests securely around your wrist.
Allow the strap to support the weight of the pole, which reduces strain on your grip.
Adjust Strap Tension:
Adjust the strap tension to keep your hand comfortably in the strap without needing to grip the pole tightly.
This allows you to maintain control of the pole while distributing the load more efficiently.
Loosening the Strap:
Loosen the strap if you’re traversing uphill or on flat terrain to promote a more natural hand movement.
Tightening the Strap:
Tighten the strap when descending or on uneven terrain to ensure a secure hold on the pole.
Use Both Straps:
Use the wrist straps on both hands, even if you’re only actively using one pole.
This balances the load and prevents unnecessary strain on one side of your body.
By using the proper grip and wrist strap technique, you’ll experience reduced fatigue and greater control over your trekking poles. Your hands and wrists will be more relaxed, allowing you to hike longer and more comfortably. Practicing and refining your grip and strap usage will become second nature as you continue to use trekking poles on various trails and terrains.
Trekking Pole Techniques
Mastering different trekking pole techniques is key to optimizing their benefits across various terrains and trail conditions. Whether you’re ascending steep slopes, descending tricky descents, or navigating flat trails, understanding these techniques will enhance your stability, balance, and overall hiking experience. Here are some essential trekking pole techniques to consider:
Standard Walking Technique:
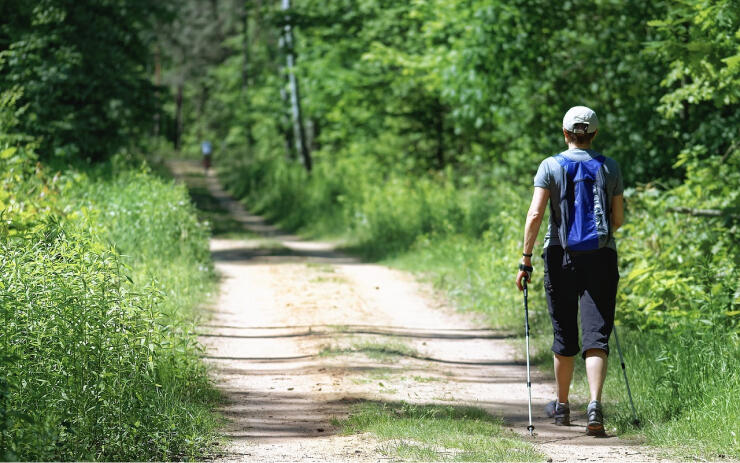
Use the trekking poles in sync with your steps, planting the pole opposite to your forward foot.
This technique provides rhythm and helps distribute your weight evenly.
Uphill Technique:
Shorten the poles slightly to provide leverage while ascending steep slopes.
Plant the poles ahead of you and push down to propel yourself upward.
Downhill Technique:
Lengthen the poles to provide stability during descents.
Plant the poles slightly behind you to prevent slipping and to absorb impact.
Flat Terrain and Pacing:
Use the trekking poles to maintain a steady pace on flat terrain.
Plant the poles slightly behind you and push off to propel yourself forward.
Crossing Obstacles:
When crossing uneven terrain, rocks, or streams, use the poles to maintain balance and support.
Place the poles diagonally across your body to create a stable platform.
Resting and Relieving Weight:
During breaks, use the trekking poles to prop yourself up and rest your legs.
This reduces pressure on your lower body and gives your muscles a break.
Engaging Core Muscles:
Utilize your core muscles when using trekking poles, especially during uphill climbs.
This engages your core for added stability and support.
Practice and Adapt:
Experiment with different techniques to find what works best for you.
Practice using the poles in various situations to build confidence and skill.
As you become more familiar with these trekking pole techniques, you’ll discover how they can improve your performance and comfort on the trail. Adjust your techniques based on the trail conditions and your personal comfort level, and don’t hesitate to refine your skills over time. Incorporating these techniques into your hiking routine will make trekking poles a valuable asset in your outdoor adventures.
Uphill Technique
Ascending steep slopes can be physically demanding, but with the right technique, trekking poles can significantly ease the effort and provide additional support. The uphill technique involves using your trekking poles strategically to maintain balance, improve traction, and distribute your weight effectively. Here’s how to master the uphill technique:
Adjust Pole Length: Shorten your trekking poles slightly to provide better leverage while ascending. This adjustment will help you generate more power with each step.
Plant Ahead: As you take a step with your uphill foot, plant the pole on the ground slightly ahead of you. The pole’s tip should make contact with the ground before your foot.
Push and Propel: As you plant the pole, push down on it to transfer some of your weight onto the pole. This action propels you upward, reducing strain on your legs and providing support.
Engage Your Core: Utilize your core muscles to help propel yourself forward. Engaging your core provides stability and additional power during the ascent.
Alternate Poles and Steps: Sync your pole planting with your steps. As your right foot steps forward, plant the left pole, and vice versa. This rhythm maintains balance and momentum.
Breathe Rhythmically: Coordinate your breathing with your steps and pole plants. Inhale as you plant a pole and exhale as you step forward.
Lean Slightly: Lean your upper body slightly into the hill to maintain balance. Your poles and engaged core will provide the necessary support.
Find Your Pace: Ascending can be tiring, so find a pace that you can sustain comfortably. Don’t rush; maintain a consistent rhythm.
Adapt to Terrain: Adjust your pole length and planting angle based on the steepness of the slope. Shorter poles may be needed for steeper inclines.
Practice and Experiment: Practice the uphill technique on various gradients to refine your form and find the most effective technique for your body.
By mastering the uphill technique, you’ll be able to conquer steep slopes with greater ease and confidence. Trekking poles become essential tools to distribute your effort, reduce fatigue, and enhance your uphill hiking experience. Remember, practice makes perfect, so spend time refining your technique to make the most of your outdoor adventures.
Downhill Technique
Descending steep descents can be challenging, but with the right technique, trekking poles can provide invaluable support, stability, and control. The downhill technique involves using your poles strategically to maintain balance, reduce impact on your joints, and navigate tricky terrain. Here’s how to master the downhill technique:
Adjust Pole Length: Lengthen your trekking poles slightly to provide additional stability and control while descending.
Plant Behind: As you take a step with your downhill foot, plant the pole on the ground slightly behind you. The pole’s tip should make contact with the ground after your foot.
Absorb Impact: As you plant the pole, let it absorb some of the impact from your descent. This reduces strain on your knees and ankles.
Lean Back Slightly: Lean your upper body slightly backward, allowing your poles to support you. This posture prevents you from leaning too far forward and losing your balance.
Use a Wide Stance: Keep your feet slightly wider apart for better stability. This stance helps you maintain balance on uneven terrain.
Engage Your Core: Utilize your core muscles to provide stability and control as you descend. Engaging your core helps you maintain a controlled pace.
Control Your Speed: Use the poles to control your speed by planting them firmly and evenly on the descent. This prevents you from going too fast.
Look Ahead: Keep your gaze focused a few steps ahead to anticipate obstacles and choose the best path down.
Choose the Right Angle: Adjust your pole planting angle based on the terrain. For steep descents, plant the poles more vertically; for less steep descents, angle them slightly forward.
Practice and Adjust: Experiment with your technique and pole angles to find what works best for your comfort and control.
Mind Your Posture: Maintain an upright posture, avoiding leaning too far forward or backward.
Descend Mindfully: Take your time, descend at a controlled pace, and choose your steps carefully.
By mastering the downhill technique, you’ll be able to descend with confidence, reducing the impact on your joints and preventing slips or falls. Trekking poles become your reliable companions, providing stability and helping you maintain control even on challenging descents. With practice, you’ll find your rhythm and comfort zone while using trekking poles to enhance your downhill hiking experience.
Flat Terrain and Pacing
While trekking poles are often associated with uphill and downhill terrain, they can also be beneficial on flat trails. Using trekking poles on flat terrain helps you maintain a consistent pace, reduce strain on your joints, and engage your upper body muscles. Here’s how to effectively use trekking poles on flat terrain and establish a steady rhythm:
Planting Technique: Plant the trekking poles slightly behind you as you walk. The poles should be angled slightly backward to push off and propel you forward.
Alternate Pole and Foot: Coordinate your pole planting with your steps. As your right foot steps forward, plant the left pole, and vice versa. This rhythmic movement adds to your stability.
Engage Upper Body: Using trekking poles on flat terrain engages your upper body muscles, providing a full-body workout and distributing effort across different muscle groups.
Maintain Upright Posture: Keep an upright posture while walking with poles. This promotes better breathing and prevents slouching.
Breathe Rhythmically: Sync your breathing with your pole planting and steps. Inhale as you plant a pole and exhale as you step forward.
Find Your Pace: Set a comfortable and steady pace that allows you to maintain the rhythm of pole planting and walking.
Boost Cardiovascular Activity: The use of trekking poles on flat terrain can elevate your heart rate, providing cardiovascular benefits.
Maintain Balance: The poles provide additional points of contact, enhancing your balance and stability on uneven surfaces.
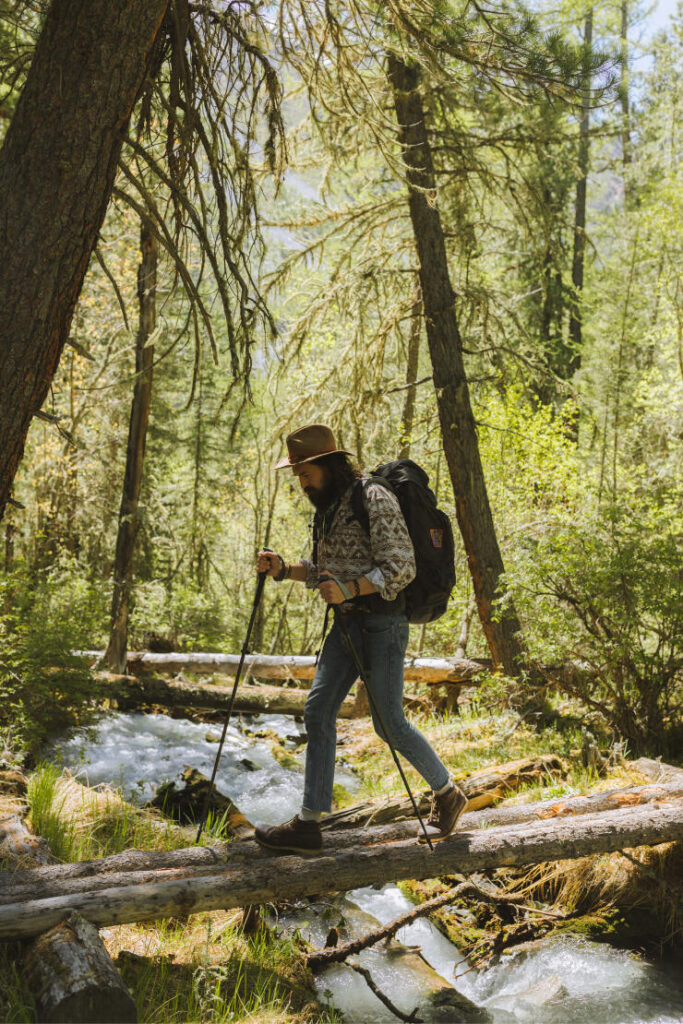
Use for Balance: When crossing streams or navigating tricky terrain, use the poles for added stability and support.
Incorporate Arm Swing: Coordinate your arm swing with your pole planting for a fluid and efficient movement pattern.
Practice Efficient Movement: Minimize excess arm movement and tension. Focus on a smooth and natural rhythm.
By incorporating trekking poles on flat terrain, you’ll not only enhance your hiking efficiency but also experience the benefits of a full-body workout. Remember that trekking poles aren’t limited to uphill and downhill sections; they can be valuable tools to maintain a steady pace, engage your upper body, and improve your overall hiking experience on all types of terrain.
Crossing Obstacles
When you encounter obstacles like rocky terrain, streams, or uneven surfaces on the trail, trekking poles can provide vital support and help you maintain balance. Using the right technique when crossing obstacles ensures your safety and prevents slips or falls. Here’s how to effectively use trekking poles when navigating various obstacles:
Choose Your Path: Assess the obstacle and choose the safest and most stable path to cross.
Shorten Poles: If the obstacle is particularly challenging or requires careful balance, consider shortening your trekking poles slightly.
Diagonal Position: Hold one trekking pole diagonally across your body and plant the tip on the opposite side of the obstacle.
Steady Support: Use the planted trekking pole as a steady support as you carefully step over the obstacle.
Counterbalance: The pole on the opposite side of the obstacle counterbalances your weight, preventing you from losing balance.
Maintain Rhythm: Continue using the rhythmic pole planting and walking technique, adjusting it to accommodate the obstacle.
Stream Crossings: For stream crossings, use the poles to test the depth and stability of the ground before stepping.
Rocky Terrain: Plant the poles firmly on stable rocks or surfaces to provide support and balance.
Unstable Ground: On loose or unstable ground, use the poles to test the terrain’s stability before placing your weight on it.
Mind Your Footing: While poles assist in maintaining balance, always focus on where you’re placing your feet.
Adapt and Experiment: Practice crossing different types of obstacles to build confidence and refine your technique.
Communicate and Observe: If you’re hiking with others, communicate and observe each other’s techniques to learn from one another.
By using trekking poles when crossing obstacles, you enhance your stability, reduce the risk of falls, and navigate tricky terrain with greater confidence. These versatile tools can be invaluable when faced with challenges on the trail, making your outdoor adventures safer and more enjoyable.
Care and Maintenance
Proper care and maintenance of your trekking poles ensure their longevity and optimal performance on the trail. Regular maintenance helps prevent wear and tear, ensures smooth adjustments, and keeps your poles in top condition. Here’s how to care for and maintain your trekking poles:
Cleaning: After each hike, wipe down the poles with a damp cloth to remove dirt and sweat. Clean the grips and straps as well.
Inspect Tips: Check the pole tips for signs of wear. Replace worn tips promptly to maintain traction.
Lubricate Locking Mechanisms: If your poles have locking mechanisms, apply a small amount of lubricant to keep them functioning smoothly.
Check Straps: Inspect wrist straps for fraying or signs of damage. Replace straps if needed.
Storage: Store your trekking poles in a cool, dry place to prevent rust and damage.
Check Adjustability: Regularly adjust the length of your poles to ensure the mechanisms are working properly.
Replace Worn Parts: If any components, such as grips or straps, are worn out, consider replacing them to maintain comfort and functionality.
Use Rubber Tips: If you’re hiking on paved surfaces, consider using rubber tips to prevent the metal tips from wearing down.
Avoid Over-Tightening: When adjusting your poles’ length, avoid over-tightening the locking mechanisms, as this can cause them to malfunction.
Carry Spare Parts: If you’re on an extended hike, carry spare parts like replacement tips or straps in case of emergencies.
Transportation: When packing your gear, protect your trekking poles by placing them in a protective carrying case or wrapping them with soft material.
Regular Check-Up: Perform a thorough inspection of your trekking poles periodically to catch any issues early.
By dedicating time to the care and maintenance of your trekking poles, you’re ensuring that they remain reliable companions on your hiking adventures. A little upkeep goes a long way in extending the life of your poles and keeping them in optimal condition for years to come.
Choosing the Right Poles
Selecting the right trekking poles for your hiking style and preferences is essential for a comfortable and enjoyable outdoor experience. With various options available, understanding the features and factors to consider will help you make an informed decision. Here’s how to choose the right trekking poles:
Material: Consider the material of the poles. Aluminum poles are durable and affordable, while carbon fiber poles are lightweight and offer better shock absorption.
Adjustability: Opt for poles with adjustable length settings. This allows you to customize the length based on the terrain and your height.
Locking Mechanism: Choose between twist-lock and lever-lock mechanisms. Twist locks are durable, while lever locks are easier to adjust.
Grip Material: Test the grip material (cork, foam, rubber) to find what feels comfortable in your hand during hikes.
Strap Design: Look for padded and adjustable wrist straps that offer comfort and can be easily adjusted.
Shock Absorption: If you hike on rugged terrain, consider poles with shock-absorbing features to reduce impact on your joints.
Weight: Balance weight and durability. Lighter poles are ideal for long hikes, while heavier poles might provide more stability.
Collapsed Length: Check how compact the poles become when collapsed for easy packing.
Tip Type: Consider the type of terrain you’ll encounter. Tungsten carbide tips are durable, while rubber tips are suitable for pavement.
Baskets: Choose baskets that match your hiking terrain. Larger baskets are better for snow, while smaller ones are suitable for rocky trails.
Brand and Reviews: Research reputable brands and read reviews to gauge the quality and performance of the poles.
Price Range: Set a budget and explore poles within that range. Keep in mind that investing in quality poles is a long-term investment.
Try Before Buying: Whenever possible, visit a store to hold and test different poles to find the ones that feel most comfortable.
Warranty: Check the manufacturer’s warranty to ensure you’re covered in case of defects or issues.
By carefully considering these factors, you can select trekking poles that align with your hiking goals and preferences. Remember that your trekking poles are a crucial part of your gear, and choosing the right ones can greatly enhance your hiking experience and overall enjoyment on the trail.
Conclusion
Trekking poles are more than just hiking accessories; they’re your partners in stability, balance, and enhanced performance on the trail. By mastering the art of using trekking poles, you unlock a world of benefits that can make your outdoor adventures safer, more comfortable, and more enjoyable.
From understanding the components of trekking poles to adjusting their length for different terrains, you’ve learned the fundamentals. You’ve discovered the proper grip and wrist strap usage techniques that optimize comfort and control. Trekking pole techniques for uphill, downhill, and flat terrain have become valuable tools in your hiking repertoire.
As you venture across obstacles and navigate various terrains, trekking poles provide essential support, helping you conquer challenges with confidence. Remember to care for your trekking poles to ensure their longevity and dependable performance on every adventure. And when selecting the right poles, your informed decision-making guarantees an equipment match that complements your hiking style.
As you set out on your journeys, let your trekking poles become an extension of your movement—a rhythmic dance that adds to the beauty and grace of your hikes. With practice and experience, you’ll find that using trekking poles becomes second nature, allowing you to connect more deeply with nature while optimizing your physical performance.
So, embark on your next trail with trekking poles in hand, ready to embrace the journey ahead. Whether you’re a novice hiker or a seasoned trekker, these reliable companions are here to elevate your outdoor experience, one step at a time.


 Do I Need a Camping Pillow?
 Best Camping Gear for Families
 Best Camping Gear For Beginners under $200