When camping, having access to clean and boiled water is essential for drinking, cooking, and maintaining hygiene. While boiling water may seem like a simple task at home, it can be a bit more challenging in a camping environment. However, with the right knowledge and equipment, you can easily boil water while camping and ensure it is safe for consumption. In this article, we will explore 10 different ways to boil water while camping, ranging from traditional methods to modern camping gear. Whether you prefer a camp stove, fire pit, or portable water heater, there’s a method that will suit your camping style. Let’s dive in and discover the various options available to make sure you have hot, clean water during your camping adventures.
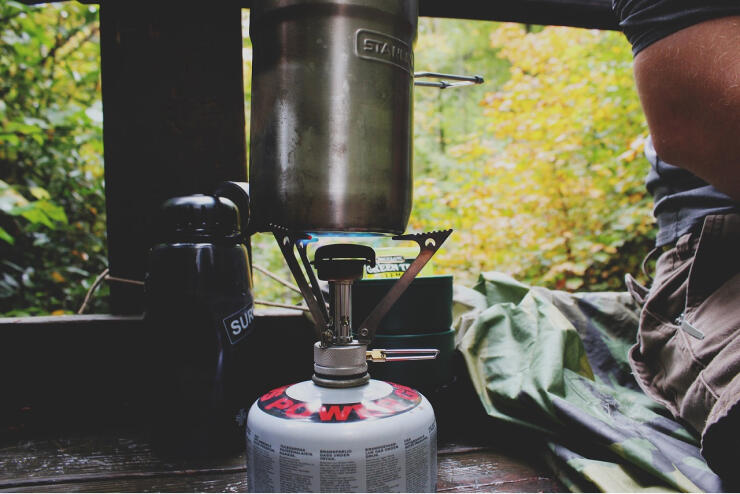
A camp stove is one of the most popular and convenient ways to boil water while camping. These portable stoves are designed specifically for outdoor use and provide a reliable heat source for cooking and boiling water. Here’s how to use a camp stove to boil water:
Set up your camp stove on a stable and level surface, away from any flammable materials or overhanging branches.
Connect the fuel source, such as a propane or butane canister, to the stove following the manufacturer’s instructions.
Place a pot or kettle filled with water on the stove’s burner.
Turn on the stove and adjust the flame to a medium-high setting.
Keep a close eye on the water as it heats up. It will start to produce bubbles and eventually come to a rolling boil.
Once the water reaches a vigorous boil, you can turn off the stove and remove the pot using heat-resistant gloves or pot grabbers.
Allow the water to cool down before using or transferring it to a suitable container.
Camp stoves offer excellent control over the heat level, making them ideal for precise temperature adjustments. They are lightweight, compact, and easy to transport, making them a popular choice among campers. Just remember to follow safety precautions, such as using the stove in a well-ventilated area and keeping it away from children and flammable materials.
Portable Water Heater
A portable water heater is another effective method to boil water while camping. These devices are specifically designed to heat water quickly and efficiently in outdoor settings. Here’s how to use a portable water heater to boil water:
Set up the portable water heater in a safe and stable location, following the manufacturer’s instructions.
Fill a container or bucket with water that you want to boil.
Attach the water heater to a suitable fuel source, such as a propane tank or butane canister, as specified by the manufacturer.
Submerge the water heating element of the portable heater into the water.
Turn on the heater and adjust the temperature control if available.
Allow the water to heat up, and monitor the temperature until it reaches a rolling boil.
Once the water has boiled, turn off the heater and remove the heating element from the water.
Allow the water to cool down before using or transferring it to a suitable container.
Portable water heaters are especially useful for camping trips where access to a camp stove or open fire may be limited. They provide a reliable and convenient way to heat water for various purposes, such as cooking, cleaning, and hot beverages. However, it’s essential to follow the manufacturer’s instructions and safety guidelines when using a portable water heater to ensure proper operation and prevent accidents.
Dutch Oven
A Dutch oven is a versatile cooking tool that can be used to boil water while camping. Here’s how to use a Dutch oven to boil water:
Place the Dutch oven on a stable and heat-resistant surface, such as a campfire grate or coals.
Fill the Dutch oven with the desired amount of water.
Cover the Dutch oven with its lid, ensuring it fits tightly to trap heat.
Position the Dutch oven over the heat source, whether it’s a campfire, charcoal, or a camping stove.
Allow the water to heat up and come to a rolling boil.
Monitor the heat and adjust the position of the Dutch oven as needed to maintain a consistent boil.
Once the water has reached a boil, carefully remove the lid, using oven mitts or heat-resistant gloves to protect your hands from the hot steam.
Use the boiled water as needed for cooking, making hot beverages, or other camping activities.
Dutch ovens are particularly suitable for campfire cooking and provide excellent heat distribution, allowing for even boiling of water. They are durable, versatile, and can be used for various other cooking tasks while camping. Just ensure that you follow proper safety precautions when using open flames or hot surfaces and always exercise caution when handling hot cookware.
Jetboil or Similar Systems
Jetboil and similar systems are popular options for boiling water quickly and efficiently while camping. Here’s how to use a Jetboil or a similar integrated stove system:
Set up your Jetboil stove on a stable surface, away from flammable materials and in a well-ventilated area.
Connect the fuel canister securely to the stove, following the manufacturer’s instructions.
Attach the cooking cup or pot to the stove, ensuring it locks into place.
Measure the desired amount of water and pour it into the cooking cup.
Turn on the stove by igniting the burner according to the specific instructions for your model (e.g., push-button ignition or manual lighting with a match or lighter).
Adjust the flame to the desired heat level, usually by turning a control valve.
Place the heat exchanger or pot support (if provided) onto the stove, which helps distribute heat evenly.
Place the cooking cup or pot with water onto the stove, making sure it sits securely.
Allow the water to come to a boil, which typically takes a few minutes depending on the stove’s power and the amount of water.
Once the water has reached a rolling boil, carefully remove the cooking cup or pot from the stove using the insulated handles or a heat-resistant pot grabber.
Use caution when handling the hot cooking vessel, and be mindful of steam escaping when removing the lid.
Use the boiled water for cooking, making hot beverages, rehydrating food, or any other camping needs.
Jetboil and similar systems are designed for quick and efficient boiling of water, making them ideal for backpacking and camping trips. They are compact, lightweight, and often include integrated features like a stove, pot, and insulation, allowing for easy setup and efficient fuel consumption. Always follow the manufacturer’s instructions and exercise caution when using any camping stove system.
Solar Water Bags
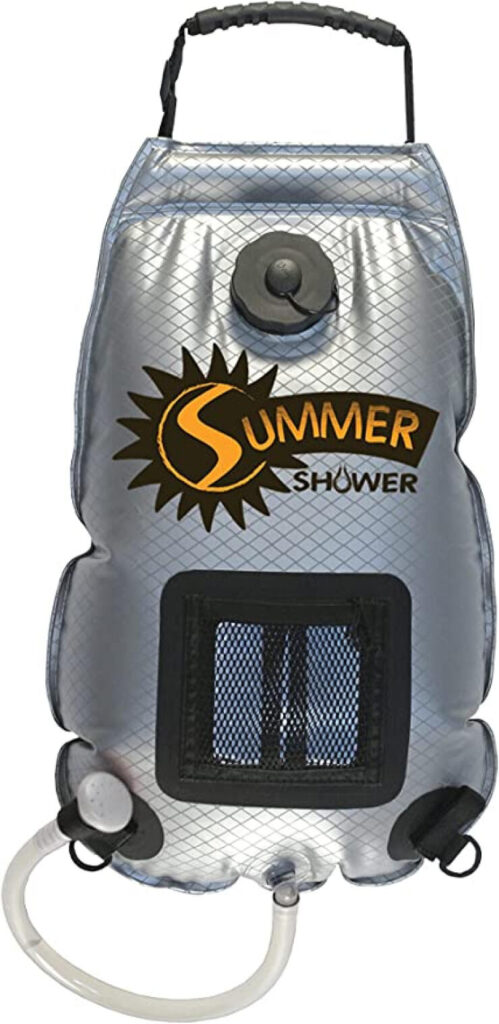
Solar water bags are another method for boiling water while camping. Here’s how to use a solar water bag:
Fill the bag with water: Start by filling the solar water bag with clean water from a reliable source. Ensure that the bag is securely sealed to prevent any leaks.
Position the bag: Find a sunny area in your campsite with direct sunlight. Hang the solar water bag in a location where it can receive maximum sunlight exposure. Consider using a tree branch, a tripod stand, or any other secure and elevated spot.
Allow the water to heat: Leave the solar water bag exposed to the sun for several hours. The time required for the water to heat up will vary depending on the intensity of the sunlight and the ambient temperature. It’s best to start early in the day to give the water enough time to reach a desired temperature.
Monitor the water temperature: Periodically check the water temperature by carefully touching the bag or using a thermometer if available. Once the water has reached the desired temperature, it can be considered safe for various uses, such as cooking, making hot beverages, or personal hygiene.
Use the boiled water: Carefully remove the solar water bag from its hanging position, taking caution as the water inside may be hot. Pour the boiled water into a separate container or use it directly for your intended purpose.
Solar water bags are lightweight, portable, and eco-friendly options for heating water while camping. They utilize the sun’s energy to gradually heat the water, making them a convenient and energy-efficient choice for outdoor enthusiasts. However, it’s important to note that solar water bags may not reach boiling temperatures as quickly as other methods, and their effectiveness can depend on weather conditions. Therefore, it’s recommended to plan ahead and allow sufficient time for the water to heat up.
Campfire Tripod and Pot
A campfire tripod and pot is a traditional and versatile method for boiling water while camping. Here’s how to use a campfire tripod and pot:
Set up the campfire tripod: Choose a suitable location for your campfire and assemble the tripod. The tripod typically consists of three sturdy poles or metal legs that form a stable base when placed over the fire.
Adjust the height: Adjust the height of the tripod by extending or retracting the legs to achieve a comfortable cooking height. Ensure that the tripod is secure and stable.
Hang the pot: Attach a heat-resistant pot or kettle to the top of the tripod using a chain or a strong metal hook. Make sure the pot is securely suspended and balanced over the fire.
Build and light the fire: Start building your campfire, ensuring that it’s contained within a fire ring or designated fire pit. Use firewood, kindling, and tinder to create a small fire.
Heat the water: Place the pot directly over the fire, allowing the flames to heat the bottom of the pot. Keep adding firewood or adjusting the fire to maintain a steady heat. The water will gradually come to a boil as the fire continues to burn.
Monitor the water: Keep a close eye on the pot to prevent the water from boiling over or the fire from getting too hot. Adjust the fire’s intensity by adding or removing wood as needed.
Boil the water: Once the water reaches a rolling boil, it is ready for use. Carefully remove the pot from the fire using heat-resistant gloves or pot handles. Remember to exercise caution as both the pot and the water will be extremely hot.
Pour and use the boiled water: Pour the boiled water into a separate container or use it directly for cooking, making hot beverages, or any other purposes that require hot water.
Using a campfire tripod and pot provides a traditional and rustic camping experience while allowing you to boil water for various needs. It’s important to practice fire safety and follow any regulations or guidelines regarding campfires in your camping area. Additionally, ensure that the pot and other equipment are suitable for use over an open flame and can withstand high temperatures.
DIY Rocket Stove
A DIY rocket stove is a simple and efficient way to boil water while camping. Here’s a step-by-step guide on how to build and use a DIY rocket stove:
Gather materials: To build a basic DIY rocket stove, you’ll need a large tin can, a smaller tin can, a metal grate or wire mesh, and some insulation material like vermiculite or perlite.
Prepare the large tin can: Remove any labels or stickers from the can and thoroughly clean it. Make sure the can has no plastic lining inside.
Cut holes: Using a can opener or a sharp knife, cut a large rectangular opening near the bottom of the large tin can. This will serve as the fuel chamber. Then, cut a smaller circular opening on the top of the can to accommodate the smaller tin can.
Insert the smaller can: Place the smaller tin can upside down into the larger can, aligning the openings. The smaller can will serve as the combustion chamber.
Create air vents: Cut four or more evenly spaced vertical slits on the larger can, just above the fuel chamber opening. These slits will act as air vents, allowing air to flow into the combustion chamber.
Add insulation: Fill the space between the larger and smaller cans with the insulation material, such as vermiculite or perlite. This insulation will help retain heat and improve the stove’s efficiency.
Attach the grate: Place the metal grate or wire mesh across the top of the smaller can, creating a stable surface for placing your cookware.
Gather fuel: Collect small twigs, sticks, or other combustible materials that you can use as fuel for the rocket stove.
Start the fire: Place a small amount of kindling or paper inside the fuel chamber and light it. Gradually add small pieces of fuel through the rectangular opening, ensuring proper airflow through the vents.
Boil water: Once the fire is established and burning well, place a pot or kettle on top of the metal grate. Add water to the pot and allow it to come to a boil. Monitor the fire and add fuel as necessary to maintain the desired heat.
It’s important to note that building and using a DIY rocket stove requires caution and attention to fire safety. Always use the stove in a well-ventilated area, away from flammable objects and structures. Also, be mindful of any local regulations or restrictions regarding open fires.
Kelly Kettle or Volcano Stove
Kelly Kettle and Volcano Stove are popular options for boiling water while camping. Here’s a brief overview of each:
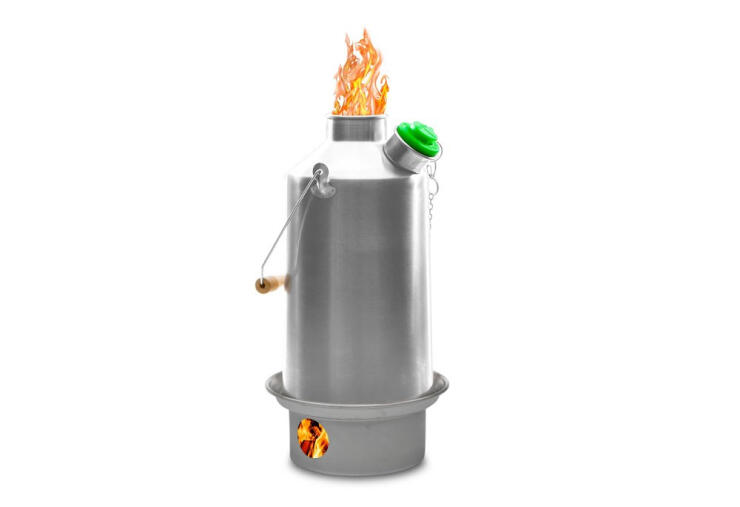
Kelly Kettle: The Kelly Kettle is a portable outdoor stove that uses a unique design to efficiently boil water. It consists of a large double-walled kettle with a chimney-like center. To use the Kelly Kettle, you place fuel (such as twigs or small pieces of wood) in the base of the kettle and light it. The heat generated from the fire rises through the chimney, rapidly heating the water inside the kettle. The Kelly Kettle is known for its fast boiling time and ability to work in various weather conditions.
Volcano Stove: The Volcano Stove is a versatile and durable camping stove that can be used for boiling water, cooking, grilling, and more. It features a collapsible design and is made of sturdy materials like stainless steel or cast iron. The stove uses various fuel sources, including charcoal, wood, and propane, depending on the model. It typically has adjustable vents and a chimney-like structure that allows for efficient heat distribution. The Volcano Stove is known for its versatility and ability to handle larger cooking tasks, making it suitable for group camping or outdoor cooking activities.
Both the Kelly Kettle and Volcano Stove offer efficient and convenient ways to boil water while camping. The choice between them depends on your specific needs, preferences, and the type of camping you’ll be doing. Consider factors such as portability, fuel availability, cooking versatility, and overall durability when deciding which stove is best for you.
Hot Springs or Natural Hot Water Sources
Hot springs or natural hot water sources can be a great option for boiling water while camping, especially if you’re looking for a unique and enjoyable experience. Here are some points to consider:
Location and Accessibility: Research and identify hot springs or natural hot water sources in your camping area. Check if they are easily accessible and safe to visit.
Water Quality: Before using hot spring water for drinking or cooking, assess its quality. Some hot springs may contain minerals or other substances that can affect the taste or safety of the water. It’s advisable to bring a water filter or purification system to ensure the water is safe for consumption.
Heat Regulation: Natural hot water sources can vary in temperature. You may need to regulate the water temperature by adding cold water or waiting for it to cool down before using it for cooking or drinking. Use a thermometer to check the temperature if necessary.
Safety Precautions: Hot springs can have high temperatures, so exercise caution when handling the water. Be aware of any warning signs or guidelines provided at the hot spring location. Avoid submerging any heat-sensitive equipment or containers directly in the hot water.
Leave No Trace: When using natural hot water sources, it’s essential to practice Leave No Trace principles. Avoid introducing contaminants, such as soap or food waste, into the hot springs or surrounding environment. Respect the natural surroundings and follow any guidelines or regulations set by park authorities.
Backup Options: While hot springs can provide an enjoyable experience, it’s always a good idea to have backup methods for boiling water, such as a camp stove or portable water heater. Depending solely on hot springs may not be feasible in all camping locations.
Remember to research and plan ahead before relying on hot springs or natural hot water sources for boiling water while camping. Understand the local regulations, respect the environment, and prioritize safety and hygiene when using these natural resources.
Conclusion
Boiling water while camping is essential for various purposes, including cooking, cleaning, and drinking. By exploring different methods and equipment options, you can find the most suitable and convenient way to boil water in your camping adventures. Whether you choose a camp stove, portable water heater, Dutch oven, Jetboil system, solar water bags, campfire tripod and pot, DIY rocket stove, Kelly Kettle, or even natural hot springs, each method has its own advantages and considerations.
Consider factors such as portability, fuel availability, speed, efficiency, ease of use, and environmental impact when selecting your preferred method. Ensure you follow safety guidelines, practice Leave No Trace principles, and respect the natural environment while boiling water in the wilderness.
By being well-prepared and knowledgeable about different boiling methods, you can enjoy safe and convenient access to hot water during your camping trips. Stay hydrated, cook delicious meals, and maintain proper hygiene with the satisfaction of knowing you’ve mastered the art of boiling water while camping.







 Do I Need a Camping Pillow?
 Best Camping Gear for Families
 Best Camping Gear For Beginners under $200